Many people overlook the importance of regularly changing the WiFi network password. Using weak or outdated passwords leaves your network vulnerable to hackers, freeloaders, and data theft.
An unsecured WiFi connection can expose you and your sensitive information. That’s not all—it slows down your internet speed due to unauthorized users and even puts your devices at risk of cyberattacks.
The good news? Securing it is simple. By setting a strong, unique password and updating your Wi-Fi password from time to time, you can protect your privacy, prevent unauthorized access, and ensure smooth, safe browsing for everyone in your household or workplace.
But changing your WiFi name and password requires following a fairly technical procedure. This article provides an in-depth guide on how to change your WiFi password on different devices, why you should change it, and more. Let’s start.
How to change a router, WiFi password – Quick guide
In a hurry? Here are quick and easy steps to change your WiFi network password:
- Find your router’s login details. At the the back of your router, you will see the router’s IP address, and the default username and password of your network.
- Open your router admin page. Enter the router’s IP address in your browser’s address bar and hit Enter. Log in with the router’s default username (mostly ‘user’ by default) and password (mostly ‘admin’ by default).
- Find the Wi-Fi settings. Go to “Network,” in the admin panel. Under that section, you will see “Wireless”, “Wi-Fi”, “WLAN” or “Wireless Settings,” click it.
- Input your new password. Then, go to “Password” or “Passphrase” and enter a strong, new password.
- Save and reboot. Find “Save” or “Apply,” button and press it. The router will reboot and you need to connect your device to WiFi with the new password.
Pro tip: 192.168.1.1 is a common IP address that many popular router brands (like Linksys, Asus, Netgear, TP-Link, D-Link, to name a few) use.
How to find your router’s default info
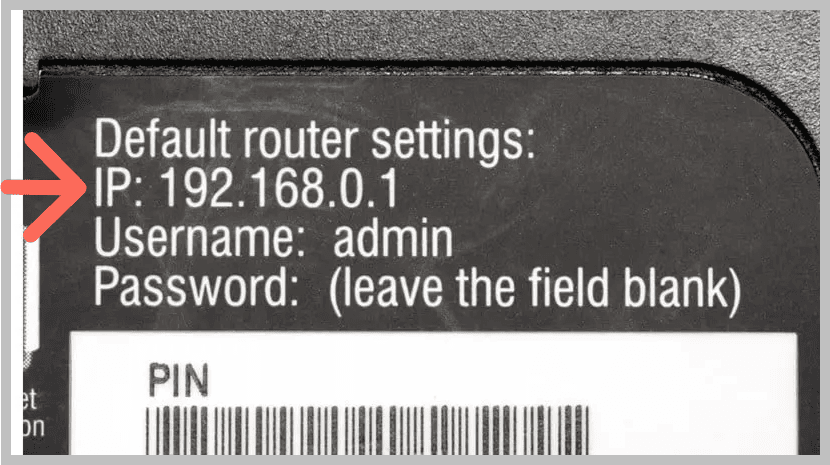
Before you begin the process of changing settings on your router, you will need to locate the default username, password, and IP address for your router. These are typically located on a sticker at the bottom or back of your router.
You are looking for the following three things:
- Router IP address: This is the IP address that you need to use to get to the router from a web browser. It will come in the form of something like 192.168.1.1 or 10.0.0.1.
- Username: The default username for the admin page of the router is user.
- Password: The default password of most routers would be admin or a series of generic numbers.
If you can’t find the sticker anywhere, you can get the default username and password from an online search by looking for your router brand/model.
Changing your WiFi password – Detailed guide

Alright, now that you have all the login details about the router, you can now change the password. The following steps are a universal way that work with most router brands (ASUS, TP-Link, Linksys, D-Link, eero, Netgear, Google, and more).
Step 1: Connecting to your router’s network
First things first, stay on the WiFi network you want to change the password of. You can use different devices, including a computer, tablet, or mobile device but staying on the WiFi network you want to change the password is a mandatory step.
Step 2: Access the admin panel
Now, you need to open your browser and type in the IP address of your router. For example, 192.168.1.1 is a common default IP address for several routers, or you can get your router’s IP address from the back of your router (as we have instructed you above on how to get your router’s info). Then press enter. The system will take you to the login page of the router’s administration panel.
Step 3: Logging in
At the admin login page, you need to give your username and password, which you can get from the sticker on your router’s back. If that does not work, the person who owned it before you could have changed them. And, if you cannot remember it, you will need to do a factory reset, which we have explained later in this article.
Step 4 – Find the wireless settings
Now that you’re logged in, the next step is to locate the section where you can change your wireless settings. The exact name of this area can vary depending on your router, but it’s usually labeled something like “Wireless,” “WLAN,” “Wi-Fi Settings,” or “Wireless Security.” Look for these options either in the menu on the left-hand side under the “Network” section, or in the navigation bar at the top of the page.
Step 5 – Password change
Within the wireless settings, look for the field named “Password,” “Passphrase,” or “Network Key.” Here, you need to enter your new WiFi password. Make sure to create one that’s strong and hard to guess.
A good approach is to mix uppercase and lowercase letters, numbers, and special characters (you can read our guide here on how to create a strong and unique password). This combination makes it much tougher for anyone to crack your password and helps keep your network secure.
Step 6 – Save changes
After entering your new password, click “Save”, “Apply”, or “OK” depending on the on-screen option you see as per your router. The router will reboot after this, and may take a couple of minutes before your internet comes to life.
Step 7 – Reconnect devices
Did you ever wonder what will happen if I change my Wi-Fi password? Once the whole process is completed, the old password will not work anymore. Every device in your household has to reconnect using the new password that you created. (You’ve got your answer if you were wondering will changing Wi-Fi password log everyone out.)
Pro tip: If you have a number of devices to manage, you can simplify your digital security by having a VPN that supports multiple simultaneous connections. Here’s our list of the best VPNs for multiple devices if you need.
Updating your router’s firmware
The router firmware is the program in your router that controls its operating system, managing network settings, ensuring security, and controlling its functions. Updating your router firmware enhances security by patching vulnerabilities, improves performance through optimization and bug fixes, and better compatibility with new technologies and devices.
Many times, manufacturers provide updates that will patch their firmware to remove vulnerabilities and/or speed up your router’s performance. If you need, here’s how you can update your router’s firmware:
- Log in to the admin panel of the router.
- Look for the section that includes a method to update the firmware. The option is most likely under “Administration,” “System Tools,” “Maintenance,” or “Advanced Settings” of your router’s admin panel. Most routers will keep the firmware update section in the same general location. Here, find sections or tabs named “Firmware Upgrade,” “Firmware Update,” or “Software Update.”
- Check for new firmware. A router sometimes will have a method to check for firmware updates automatically. If not, you normally have to go to the manufacturer’s website to find your exact brand and model of router. Then, download and save the newest firmware file.
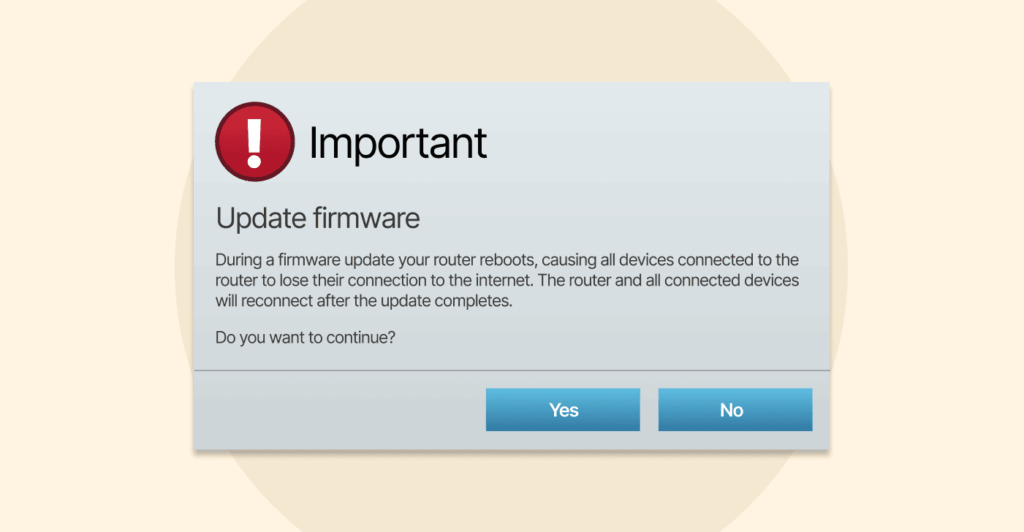
- Update/install the firmware. By this point, you will likely follow on-screen prompts, generally just confirming the firmware update or new installation of the firmware. This usually takes a few minutes. Don’t turn your router off while the firmware is being updated, as the router itself will automatically reboot.
How to change your router’s name
Your router’s name (SSID) also has a security aspect to it. Moving it from the default name makes it more difficult for hackers to identify your router’s make and model and eliminates attacks on known vulnerabilities.
- Log in to the router settings using the IP address and login credentials.
- Find the Wi-Fi settings. Inside the admin panel, look for a section called “Wireless”, “Wi-Fi”, or “Wireless Settings” under the “Network” section.
- Change the name. Find the network name (SSID) field and enter a new name. It is best not to use a name that provides any personal information, like your house address or your family’s name.
- Save and restart. After entering the new name, save the settings. Your router will restart, which requires you to reconnect all your devices.
Change WiFi password on Android and iPhone
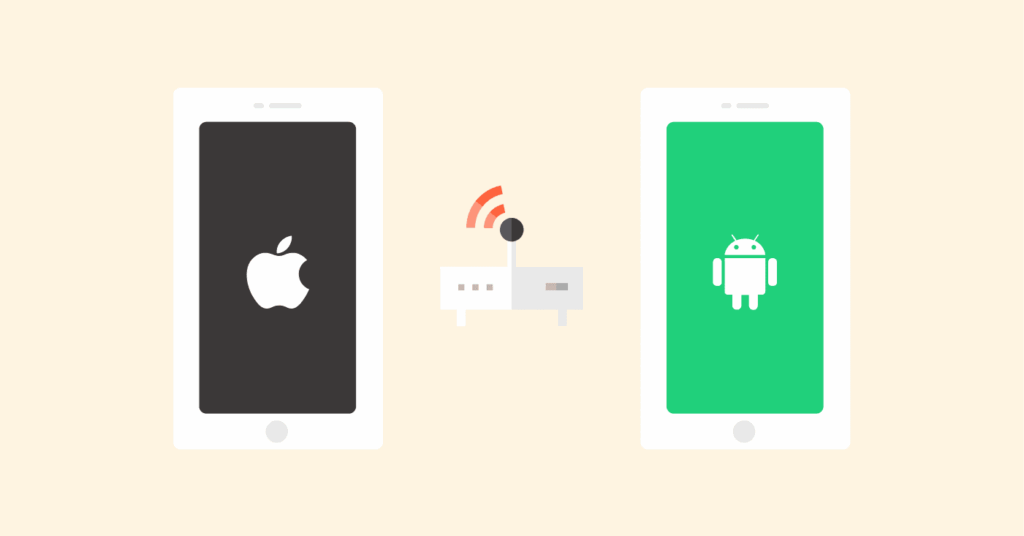
The process of changing the WiFi password on mobile such as an iPhone (iOS) or an Android device is the same as on a desktop computer. You can use web browser to change your WiFi credentials on a mobile device effortlessly. Follow the steps below:
- Connect to your WiFi. Connect your device to the WiFi network you want to change the password.
- Open your browser. Open whichever browser you have on your device. For example, for an iOS device, open Safari, and for an Android one, you might want to use Google Chrome.
- Go to your router’s admin page. Type the router IP address in the URL bar to get to the admin panel.
- Log in and change the password. Use your existing router credentials to log in, and go to the “Wireless settings” or “WLAN” under the “Network” tab, and change the password.
This method will work for every router brand (including those we listed below).
Change the WiFi password on different routers
Although the process mentioned above applies to most routers, the menu titles and actual procedures may vary. Here are specific instructions on some common brands to help you with your WiFi password change login.
1. Change the WiFi password on TP-Link routers
- Connect your device to your TP-Link and open a web browser.
- Open a web browser and type tplinkwifi.net or 192.168.0.1. This will take you to the TP-Link WiFi password change login page.
- If you don’t know the username and password, then use the default username (admin) and password (also admin).
- After you log in, on the left-hand side of the page, click “Wireless.”
- Select “Wireless Security,” and find the “Password” field.
- Enter your new strong password, and hit the “Save” button.
2. Change the WiFi password of D-Link routers
- Make sure you connect to the D-Link network and open any browser.
- In the URL bar of the browser, type 192.168.0.1. It will take you to the admin login page of most D-Link models.
- Type in username = admin; the password = usually admin or blank.
- Click on the “Wireless” tab at the top of the page.
- Now, click the “Wireless Security Mode” section and then “Password.”
- Enter your new password and press “Save Settings.”
3. Change the WiFi password of NETGEAR routers
- Before changing the WiFi password of the NETGEAR router, ensure you are connected to the NETGEAR network, then open any browser.
- In the address line, type routerlogin.net or 192.168.1.1.
- Enter the username (admin) and password (password) to log in unless you have already updated them.
- Click on the “Wireless” button in the left menu.
- After that, check for the “Password (Network Key)” entry field and enter a new password.
- When you are done, click on “Apply”.
What if I forgot my router password?
We are all human; it can happen to anyone, right? The only way to get into the router admin dashboard, if you’ve forgotten the password, is to perform a factory reset on the router.
When you do a factory reset on your router, it will delete all your previous settings, including such as your username/password, network name, etc. Now you have the router’s settings back to the default status.
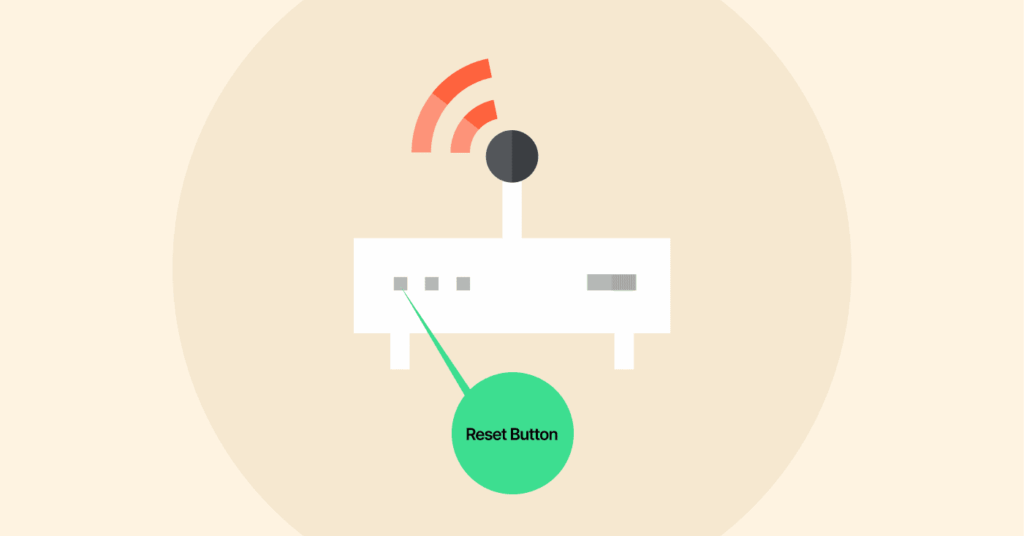
To perform a factory reset on the router, find a small recessed button (usually located on the back side of the router) that has the label “Reset.” Use a paperclip or whatever you have on hand to press the button and then hold it for at least 10-30 seconds until the lights on the router start to flash.
After the reboot of the router, you will need to go back into the admin portal to get the original username and password, usually printed on the sticker at the back of the router.
Don’t want to reset your router?
You can also find your WiFi password out using your computer as long as it’s connected to the same wireless network. On Windows:
Go to the Control Panel, then Network and Sharing Center, and there click on the name of your desired WiFi network, then click on Wireless Properties, there you need to select Security tab, and finally check Show characters.
Seeing your WiFi password on Mac involves considerably fewer steps:
First up, open your Keychain Access via Spotlight (shortcut is Command-Spacebar) and then search for your network name, now double-click on it, there you need to select “Show password.” In the final step you’ll need to provide the administrator password to reveal the password.
How to further secure your router
Changing your WiFi password is like locking your front door. Smart move. But to keep yourself further secure from hackers, you need to do a few workarounds. Here’s how to truly secure your router:
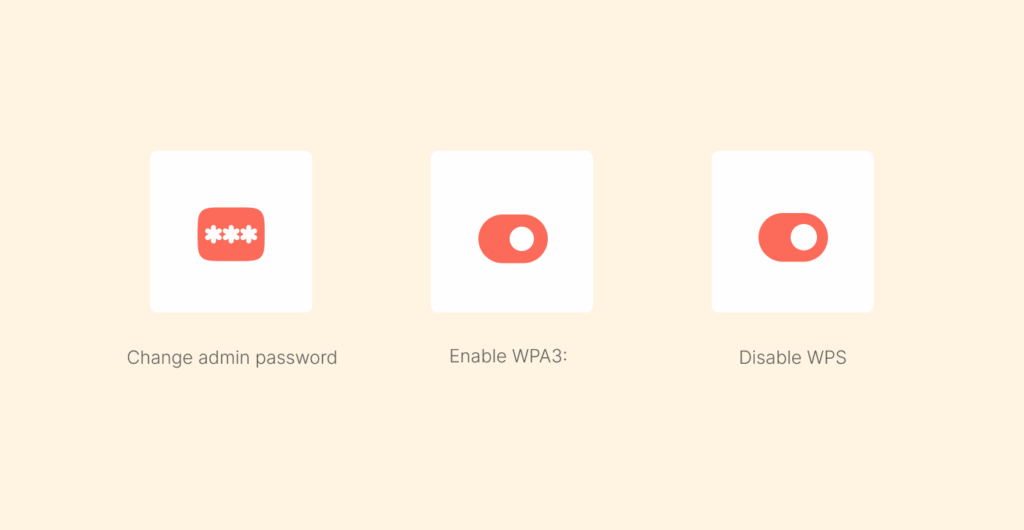
- Change the admin password: The first thing you should do once you are logged into your router for the first time is change the name and password of the router.
- Enable WPA3: If your router has WPA3, you need to enable the latest WPA3 security protocol, as this is the new and most secure encryption standard for Wi-Fi. In 2018, the Wi-Fi Alliance released WP3, replacing the older and outdated WPA2 standard and providing robust security for both personal and public networks.
- Disable WPS: WPS is short for Wi-Fi Protected Setup. It allows you to connect to a network by just pressing a button. WPS is more susceptible to brute-force type attacks, so be sure to disable your WPS and only connect to the network using the encryption password.
- To disable it, you need to log in to your router’s admin console, navigate to the advanced or wireless settings, locate the WPS option, then turn off or uncheck the feature, and save your settings.
- Keep firmware up to date: The firmware of your router is what is referred to as the operating system of your router. Most of the time, manufacturers release firmware updates to address security vulnerabilities. One of the best security practices in life is to keep your router up to date. You should regularly check your router to verify that you are running the latest firmware version.
- Install a VPN on your router: VPNs are the need of today’s every-evolving digital life. You should consider installing a VPN on your router directly if you want to achieve the ultimate level of privacy and security. Having a VPN installed encrypts the web traffic of every single device connected to your router network (your smartphones, gaming consoles, and smart TVs). You can check our guide to the best VPNs for routers to get started.
FAQs
The general rule for WiFi security says that one should at least change their WiFi password once or twice a year. Also, change the password instantly if you suspect a guest or someone else may have gotten into your network. An ever-fresh and strong password guarantees that a home network is secure from hackers.
Most manufacturers print the IP addresses on a sticker placed at the bottom or back of a device. The common IP addresses are 192.168.1.1 and 192.168.0.1. But sometimes there are exceptions. If you fail to look for the sticker, then you’ll have to look up online for your router with its model number and find the default IP address.
An ideal, strong password should have at least 12 characters, mixing both uppercase and lowercase letters with numbers and special symbols. Give no thought whatsoever about incorporating any personal information, such as birthdays or names. The best are passwords composed of random characters that can hardly be guessed.
No, it is perfectly safe to factory reset your router. Just be aware that doing this will erase all of your custom configuration, including the WiFi password and name. After the factory reset, you will have to configure everything from scratch using the default login credentials.
WiFi passwords (or network keys) are passwords used by wireless devices to access your network. Your router password (or admin password) is used to log in to the admin panel, the place to change settings. Both passwords should be changed from the default to enhance security.
Yes, you can call your Internet Service Provider (ISP), Xfinity, at 1-800-XFINITY to change your Wi-Fi password. Please note in the case of Xfinity, you can do that only if you have a non-Comcast cell phone or email on your account for verification. Many ISPs also have apps (such as Xfinity app in your case) that you can use to change your password quickly if you don’t want to use the manual wireless Gateway Admin Tool method.
Yes, changing your WiFi password helps stop hackers (given that you’ve set a unique and strong password now and you earlier had default or a weak one), but remember, it’s not a complete solution on its own. We recommend updating your SSID (the default network name), using a strong WPA2 encryption, consider disabling features like remote administration and WPS, and always keeping your router’s firmware up-to-date.